Steve's blog about RMPrepUSB, Easy2Boot and USB booting and sometimes other stuff too!
Visit www.rmprepusb.com for over 140 Tutorials on USB booting or www.easy2boot.xyz for a unique USB multiboot solution.
Now should work with Win8.1 Retail install ISOs which use \sources\install.esd instead of install.wim
Option to erase partition 4 if detected on the E2B drive when booting (use with care!)
64-bit XP install ISOs will now not use DPMS2 (which is 32-bit only) if there is '64' in the ISO name - so you can now press F6 and install the firadisk and winvblock 64-bit drivers.
3rd level folders now removed except for a single MNU folder - e.g. \_ISO\MAINMENU\MNU and Sample .mnu files changed to use \_ISO\xxx\MNU folders.
8.1 Enterprise 90-day Eval product key added so you can install from the free M$ downloadable ISOs.
Windows Vista+ ISOs are now only loaded using ImDisk and not Firadisk - the Firadisk drivers are no longer used and have been removed (but still used for XP using an F6 floppy image).
Memtest86-5.0.0 ISO added to Utilities - Memory Test menu
Note: You can still use any name for the 3rd level folders instead of MNU, and you can overwrite your E2B drive with v1.20 and it will still work.
Please let me know if there are any problems with this new version (and any successes you have too!)
If you copy the Windows 8.1 Enterprise 90-day Evaluation ISO to your Easy2Boot \_ISO\WINDOWS\Win8 folder of your Easy2Boot USB drive and try to install it, you will find that you will receive a pop-up error message which reads 'Windows cannot find the Microsoft Software License Terms'.
This is a sign that the product key chosen by you, and subsequently written to the AutoUnattend.xml by Easy2Boot, is missing or incorrect.
Although this version does not require the user to enter a Product Key when installed from a DVD or from a 'flat-file' USB drive, to get these ISOs to work in Easy2Boot, you need to use the product key that is embedded inside the product. To find out what the product key is, you can install it to a VM from the ISO file, or use RMPrepUSb to extract the ISO to a USB drive and install it to a real system. Then run the Magical Jelly Bean KeyFinder to find the Product Key. In the case of Windows 8.1 Enterprise 90-day Evaluation it turns out to be 76FKW-8NR3K-QDH4P-3C87F-JHTTW.
We can now either create a .key file in the \_ISO\WINDOWS\Win8 folder for this key (copy an existing example file and modify it), and/or add it to the CHOOSE FROM A LIST.key file (in both the menu and the place where the variable is set).
E2B version 1.20 will contain a key file for Windows 8.1 Enterprise 90-day Evaluation.
P.S. Use the command slmgr -rearm from an Admin command console to get an extra 90-days when your first 90 days expires.
As an alternative, you can convert the ISO to a .imgPTN file using the MPI Tool Kit. If you use the MPI_FAT32 shortcut, then it will also be UEFI-bootable too.
Update: a donation is required for GE Geek ToolKit now.
OK, you have eaten as much Turkey as you possibly can and even the Brussel sprouts weren't too bad, you've also consumed as much alcohol as you can (probably a bit too much!) and opened all your presents (ready to exchange as soon as the shops open). There is nothing on TV except repeats, and Uncle Fred is snoring his head off so you can't hear a thing anyway.
So why not checkout the massive GE Geek Tech Toolkit? The link for the Toolkit is at the very top of the GE Geek home page or click here for a direct link to the download page.
The download is a 1.3GB ZIP file which extracts to almost 2GB of portable apps. It works like this:
1. Extract the files to the root of a USB drive and makes a \GeGeek Toolkit folder on the drive.
2. Run GeGeek_Toolkit.exe from the \GeGeek Toolkit folder on the USB drive - this puts an icon in your Windows Desktop TaskBar (a small arrow in a circle)
3. Now right-click on the taskbar icon and run 'Run Ketarin Update' - this will update all the apps to their latest version (if you have an internet connection)
4. Quit GeGeek_Toolkit (right-click on the icon and Exit) and then run it again.
You now can run hundreds of portable apps from the GeGeek Tech_Toolkit panel (right-click the task bar icon)!
As well as the apps listed in the pop-up panel, WSCC Portable contains the Microsoft and NirSoft apps. This also has an auto-update feature.
The toolkit is regularly updated by the author and is free (though you can make a donation).
Put this on your USB toolkit drive and you have a load of useful apps all in one place and all easily update-able! Why not download it and check out the 100's of useful apps! Also checkout the very useful references and utilities listed on the main home page.
P.S. Did you know Brussel sprouts taste better now than they used to 10 years ago? That bitter taste that many people don't like has been genetically engineered out of them. There are about 30 varieties of the 'sprout' now and the new ones are really nice (honest!). You can even eat them raw - try slicing them up and adding them to a salad (but it would be best to sleep alone that night or blame the dog!).
I have now changed the links in Tutorial 72a.
v1.19 is now available as the E2B download and as the E2B+DPMS2 Mass Storage Drivers download.
The only difference between v1.19 and v1.19Beta is that v1.19 will warn the user if he/she is trying to install from a Vista/7/8 Install ISO from a USB Hard disk without a 'Helper' USB Flash drive also being present.
Hopefully, this will give new users a hint that they need a USB 'Helper' drive if they try to install from a USB Hard drive.
If you have installed Avast! AV (Avast 2014.9.0.2008) onto your Windows system, you can make a bootable USB drive or ISO file from the Tools menu. However, you may run into problems when using it to make a USB drive. Here are some quick instructions for 3 different situations (see the 'Long Story' below for more details):
Easy2Boot (and many other grub4dos boot drives) require the files on the bootable USB drive to be contiguous for certain features to work.
RMPrepUSB has an option to run WinContig (included in the RMPrepUSB download) using the Ctrl-F2 hotkey in RMPrepUSB to make all the files on the E2B drive contiguous. Sometimes WinContig may fail to make all files contiguous however and this is usually due to the lack of free space available on the drive.
In the diagram above, FILE 4 is 1.3GB in size and is not contiguous.
Since there is not 1.3GB of contiguous free space on the drive, WinContig cannot copy the FILE 4 to an area of contiguous free space because there is no free space large enough.
If you copy a new 1.3GB file to this drive, it will have to occupy the unused free space and so the new file will also be non-contiguous
A nice tool you can use to help you look at the files on the USB drive and understand what is happening is the free Piriform Windows utility Defraggler.
Defraggler also asks if you want to erase the Recycle Bin files when you Analyze or Defrag a drive.
As you can see from the screenshot above, you can select a drive, click Analyze and then immediately see the fragmented files (shown by the red squares). You can then select a red square and Defraggler will list what files are in that block. You can then tick the checkbox next to any of these files and defragment them separately by clicking the 'Defrag checked' button. Nice!
WinContig does not consolidate the unused free space on a drive volume. This means that if there is not a contiguous run of free clusters on the drive, WinContig and Defraggler will not be able to defrag a large file.
However, you can use the Defraggler - Defrag Freespace option to collect all the unused clusters into one or two large blocks. This is a very useful feature and will often fix any WinContig issues you may have (run WinContig afterwards).
Defraggler is not a good tool to use on the whole USB drive however. It attempts to move all the files to the beginning of the drive as well as make them contiguous. This can take a longggg time and is also unnecessary. What is more, if you Stop Defraggler during a defrag operation, it can prevent the drive from being defragged again and prevent WinContig from being able to make all the files contiguous unless you first delete a large file from the USB drive to make more room or use the Defrag Freespace option! So I would advise that you only use Defraggler to defrag single files and don't interrupt it once it has started. If you need to make all files on a drive contiguous use WinContig (or Ctrl+F2 in RMPrepUSB).
P.S. In case you missed it, in a previous blog post, I describe a case where a 6GB ISO could not be copied and then defragged on an empty 8GB USB drive and the reason why this happens.
I have uploaded v1.19 and called it a Beta because there are quite a few changes.
I found that the grub4dos 0.4.6a version of grldr used in E2B v1.18 has bugs (hangs on the find command) and so with v1.19 I have gone back to using the 0.4.5c version (2013-11-30).
Other E2B v1.19Beta changes are:
If using a 1024x768 background you may have observed horizontal black lines across the lower 1/3 of the screen. This is now fixed (thanks for reporting this Krishna).
Clonezilla .mnu file added to docs folder for easy backup/restore from an external USB E2B HDD.
A language folder (\_ISO\e2b\grub\ENG) now holds some files which are use by E2B for the English messages. You can now copy this entire folder (to say \_ISO\e2b\grub\SPANISH) and then change the text in the SPANISH folder files. To flip over E2B to use these Spanish files, use 'set LANG=SPANISH' in your MyE2B.cfg file.
If you had 'iftitle' entries in your Main menu, you may have noticed that they disappeared if you returned from a sub-menu to the Main menu. This has now been fixed (thanks again for reporting this Krishna). Note that some of the sample .mnu files in the docs folder have also been tweaked and you may need to update your E2B .mnu files with the new version if you have used xbmcbuntu_12.2_Persist.mnu or CloneZillaBackupRestoreHDD0.mnu.
The PassPass download (see bottom of the E2B Tutorial 72a page) has been modified. This had some problems with corrupting 1024x768 backgrounds and returning back to previous menus.
Multiple Language Support
Note: You could put code at the bottom of your MyE2B.cfg so that the user can choose a language - e.g.
set LANG=ENG
set ask=
set /p ask=SPANISH or ENGLISH (Seleccionar espanol o Ingles) [S=Spanish/espanol] :
if /i "%ask%"=="S" set LANG=SPANISH
set ask=
Note that you must use 'espanol'instead of 'español'as when MyE2B.cfg is run, we are still in text mode and not in graphics mode so UTF-8 characters won't display correctly.
Of course, all of the .mnu files would also have to be modified where required - e.g. for instance, for the \_ISO\MAINMENU\ZZZF8ReloadMenu.mnu file, you would need to rename it and then modify it and add extra menus for Spanish (save the .mnu file in UTF-8 format so you get the grave accents, etc.):
For example, this will display the F8 option in the Main menu in either English or Spanish, depending on what the user chooses when E2B boots:
iftitle [if "%GFX%"=="" if "%LANG%"=="ENG"] ^F8 Reload Main Menu [F8]\n debug 0 if exist (bd)/_ISO/e2b/grub/menu.lst configfile (bd)/%grub%/menu.lst if not exist (bd)/_ISO/e2b/grub/menu.lst set MFOLDER=/_ISO/MAINMENU && configfile (md)0xA000+0x50 boot iftitle [if not "%GFX%"=="" if "%LANG%"=="ENG"] Reload Main Menu\n debug 0 #clear all variables if reload menu.lst! if exist (bd)/_ISO/e2b/grub/menu.lst configfile (bd)/%grub%/menu.lst if not exist (bd)/_ISO/e2b/grub/menu.lst set MFOLDER=/_ISO/MAINMENU && configfile (md)0xA000+0x50 boot iftitle [if "%GFX%"=="" if "%LANG%"=="SPANISH"] ^F8 Recargar Menù Principal [F8]\n debug 0 #clear all variables if reload menu.lst! if exist (bd)/_ISO/e2b/grub/menu.lst configfile (bd)/%grub%/menu.lst if not exist (bd)/_ISO/e2b/grub/menu.lst set MFOLDER=/_ISO/MAINMENU && configfile (md)0xA000+0x50 boot iftitle [if not "%GFX%"=="" if "%LANG%"=="SPANISH"] Recargar Menù Principal\n debug 0 #clear all variables if reload menu.lst! if exist (bd)/_ISO/e2b/grub/menu.lst configfile (bd)/%grub%/menu.lst if not exist (bd)/_ISO/e2b/grub/menu.lst set MFOLDER=/_ISO/MAINMENU && configfile (md)0xA000+0x50 boot
Please let me know how you get on with this new version. When the bugs are fixed in grub4dos 0.4.6a I will switch back to it again, but for now use the 0.4.5c 2013-11-30 version of grldr (272,951 bytes).
E2B uses a lot of .mnu text files which can easily be edited by the user. However, some of the menu entries come from code embedded in the grub4dos script files and these are difficult to change.
E2B v1.19 will have better support for you to change much more of the menu and scripts into different languages. The new versions has a new \_ISO\e2b\grub\ENG folder containing these files:
If you want to change the text in any of these files to Spanish or French or whatever, then simply copy the whole folder and make a new folder under the grub folder - e.g. \_ISO\e2b\grub\SPANISH. You can then change the text in those files as you like. To switch over to your new files, set the LANG variable in your \_ISO\MyE2B.cfg file, e.g.
set LANG=SPANISH
You can also copy the \_ISO\e2b\cfg\Menu.lst file to your new folder and change the startup messages if you wish.
This means you can change these files without affecting the E2B files. Any new E2B updates will not affect your files.
See my previous blog for details on how to allow the user to choose between two languages.
Update: Using E2B v1.32 and later, you can boot from a partition image containing the Windows Install files. This means you can have lots of different .imgPTN files on your E2B hard disk and boot to any of the images in either MBR/BIOS CSM mode or UEFI mode without needing a Helper flash drive. It only takes a minute to create the image file from a Windows Install ISO and add it to your E2B drive.
Easy2Boot can install Windows Vista and later Windows OS's from any number of different Windows Install ISO files on the E2B USB drive, however if your E2B drive is a hard drive or fixed-disk type of Flash drive (i.e. not a removable Flash drive) then you also need to connect a USB 'removable' Flash drive (Helper drive) when you boot from the E2B Hard drive.
This is because the AutoUnattend.xml file is only detected by Windows PE Setup if it is on a removable drive (such as a removable USB Flash drive or DVD). The special E2B AutoUnattend.xml file (if detected by Windows PE) causes the whole Windows ISO to be loaded as a Virtual drive. If Windows Setup does not see a \Sources folder on any drive in the system, we get this message:
However, if you only ever want to install from just ONE Windows Install ISO from an E2B hard drive, you can just extract the \Sources folder from the ISO that you want to use and copy the whole \sources folder to the root of your E2B Hard drive. Then when Windows PE Setup boots, setup will see the \sources folder and be happy (i.e. you won't see the 'A required CD/DVD drive device driver is missing' message).
To get Windows 7 to prompt you to choose from a number of Windows 7 versions (Basic, Professional, Ultimate, etc.) then delete the \sources\ei.cfg file. So on your E2B USB HDD we have:
\_ISO\WINDOWS\Win7\Win7_32_SP1.iso
\Sources\*.* (extracted contents of \sources folder from the Win7 Install ISO)
Actually, I found that only 2 Win7 files (\sources\setup.exe and \sources\install.wim) are required for a Win7 SP1 install in this way (I have not tested other Windows versions). Win8 may need a special ei.cfg file or more files in the \sources folder than Win7.
To save space, you can delete the large \sources\install.wim file inside the ISO file using a suitable ISO editing utility (e.g. Daemon Tools or Magic ISO).
P.S. To install Vista/7/8 from ISO files an E2B USB HDD (or if booting from a VM) without a USB removable Flash Helper drive, you can manually run \_ISO\e2b\Firadisk\LOADISO.cmd - see here for details.
[Edit] Win8.1 also needs just the \sources\install.wim and the \sources\setup.exe files.
Today I tried to backup my Dell Inspiron 530 system's internal SATA hard disk by booting from my 2TB WD Passport USB 3.0 hard disk installed with Easy2Boot and containing the Clonezilla ISO and the .mnu file detailed in the previous blog post.
It was the first time that I had tried to boot the Dell system from the Passport drive and it seems that the Dell doesn't like it! If I connect the Passport drive to one of the Dell USB 2.0 ports, not only does the Dell BIOS not detect the Passport USB drive, but it also does not detect any other USB drive which I also have connected at the same time.
Even if I connect a single USB Flash drive only, press F12 to get to the BIOS Boot Selection menu and then connect the Passport hard drive, the BIOS fails to boot from the USB Flash drive (the symptoms indicate that the USB Flash drive is no longer accessible as it only tries to boot from the other internal drives in the system).
In the end, I found that I needed to boot with only an E2B USB Flash drive connected, boot to the E2B menu from the Flash drive and then connect the Passport USB hard drive. Then, when I booted to the Clonezilla ISO, Clonezilla saw the two USB drives and all the internal hard disks.
The problem now was that E2B had enumerated the hard drives in the system incorrectly and so it had set the Passport USB drive as sdd1 (my Dell system has 3 internal hard drives), whereas the Passport USB hard drive was designated as sde1 by Clonezilla once it had booted.
To fix this I modified the Clonezilla menu that I posted in my previous blog. Now the user can override the drive designations chosen by the E2B grub4dos menu code if they wish (see below):
I have updated the previous blog post with the new menu code and also updated the .mnu file in Tutorial 118. So now you can boot from an E2B USB Flash drive but you can store the Clonezilla backups on another drive (or even backup or restore a different drive in the system).
Let me know if you try this and tell me how you got on.
Cheers
Steve
By adding the Clonezilla ISO to your large E2B USB bootable hard drive plus a .mnu file, you can easily create and restore complete hard disk images. Clonezilla can be scripted so that you can define the location of the backup images and the disk to be operated on (i.e. backed-up or restored).
Tutorial 118 describes how to add these options to your E2B menu:
The E2B menu is hard-coded to use '/dev/sda' as the target drive. This means that when you boot from the E2B USB drive, you must ensure that sda is the drive that you want to backup or restore. All backup images are placed in the /clonezilla folder on the E2B USB drive.
Also, E2B assumes that the last linux drive is the E2B USB drive where the /clonezilla image backups are kept. E2B tries to guess at the linux drive designation of the E2B drive, but again you need to double-check this before you confirm the operation.
If you wish you can run the ISO manually and choose your own options.
So add the ISO and .mnu file to your 1TB E2B USB Hard disk and try it out on a test system (but be careful when restoring!).
Disclaimer: please don't blame me if you accidentally wipe your system hard disk when restoring an image or wipe your USB E2B drive - Clonezilla is a powerful tool!
Any comments welcome.
Here is the .mnu file (you can download it from the Tutorial), it is also included in the latest version of E2B in the \_ISO\docs\Sample mnu files folder.
# Note: This menu is for Easy2Boot USB drives which have an unused 4th partition entry - the partnew command used in the grub4dos menu below will erase the 4th partition on the USB boot drive.
# Make a \_ISO\BACKUP\Clonezilla folder and copy clonezilla-live-20131125-saucy-i386.iso and this file to it # Make and empty \clonezilla folder on your E2B drive (note all lower case letters!) # If you want the menu to appear in the Main E2B menu - use a \_ISO\MAINMENU\clonezilla folder instead. title Create Backup Image of first Hard Disk (Clonezilla)\n Make an image backup of your internal hard disk set ISO=%MFOLDER%/Clonezilla/clonezilla-live-20131125-saucy-i386.iso set WDRV=sda # Backup drive is always last drive set /a HDCNT=*0x475 & 0xff set /A BAKDRV=%HDCNT%+0x60 echo %BAKDRV:~1,9% | set dlet= echo -e sd\%dlet%1 | set BAKDRV= echo BACKUP DRIVE echo -e ============ echo echo BACKUP IMAGES will be placed in clonezilla folder on $[010f]%BAKDRV% set /p ask=Press ENTER if OK or specify the linux name of the USB partition (e.g. %BAKDRV%) : echo echo if not "%ask%"=="" set BAKDRV=%ask% set ask= echo The drive to be backed up will be $[010f]%WDRV% set /p ask=Press ENTER if OK or specify the linux name of the target drive (e.g. %WDRV%) : echo if not "%ask%"=="" set WDRV=%ask% echo echo You can check the drive names once CloneZilla has booted. echo -e When Clonezilla starts, select <Cancel> echo Then choose 'cmd' to get to the command prompt echo Then type sudo fdisk -l to show all the drives in the system echo or type sudo fdisk -l /dev/sdb to show drive sdb parameters echo echo $[010f]%BAKDRV% WILL CONTAIN THE IMAGE FILES echo $[010f]%WDRV% WILL BE THE DRIVE TO BE BACKED UP echo set /p ask=Press Y to continue (Y/N) : if not /I "%ask%"=="Y" configfile (md)0xa000+0x50 echo set ask= set HDCNT= set dlet= partnew (hd0,3) 0x00 %ISO% map %ISO% (0xff) map --hook set BOPT=boot=live quiet live-config noswap nolocales edd=on nomodeset ip=frommedia ocs_live_keymap="NONE" splash set RUN=ocs_live_run="ocs-live-general" keyboard-layouts="NONE" locales="en_US.UTF-8" live-media-path=/live toram=filesystem.squashfs ocs_live_batch="yes" set PRERUN=ocs_prerun="mount /dev/%BAKDRV% /mnt" ocs_prerun1="mount --bind /mnt/clonezilla /home/partimag/" set RUN1=ocs_live_run="ocs-sr -q2 -c --batch -j2 -z1p -i 2000 -sc -p true savedisk ask_user %WDRV%" #echo kernel /clonezilla/live/vmlinuz %BOPT% %RUN% %PRERUN% %RUN1% #pause root (0xff) kernel /live/vmlinuz %BOPT% %RUN% %PRERUN% %RUN1% initrd /live/initrd.img title Restore a Disk Image to first Hard Disk (Clonezilla)\n Restores all partitions from an image.\n WARNING: THIS DESTROYS ALL PARTITIONS and FILES! set ISO=%MFOLDER%/Clonezilla/clonezilla-live-20131125-saucy-i386.iso set WDRV=sda # Backup drive is always last drive set /a HDCNT=*0x475 & 0xff set /A BAKDRV=%HDCNT%+0x60 echo %BAKDRV:~1,9% | set dlet= echo -e sd\%dlet%1 | set BAKDRV= echo RESTORE DRIVE echo -e ============= echo echo IMAGE FILES will be looked for in the clonezilla folder on $[010f]%BAKDRV% set /p ask=Press ENTER if OK or specify the linux name of the USB partition (e.g. %BAKDRV%) : echo echo if not "%ask%"=="" set BAKDRV=%ask% set ask= echo The drive to be written to (all partitions) will be $[010f]%WDRV% set /p ask=Press ENTER if OK or specify the linux name of the target drive (e.g. %WDRV%) : echo if not "%ask%"=="" set WDRV=%ask% echo echo You can check the drive names once CloneZilla has booted. echo -e When Clonezilla starts, select <Cancel> echo Then choose 'cmd' to get to the command prompt echo Then type sudo fdisk -l to show all the drives in the system echo or type sudo fdisk -l /dev/sdb to show drive sdb parameters echo echo $[010f]%BAKDRV% WILL CONTAIN THE IMAGE FILES echo $[010f]%WDRV% WILL BE THE DRIVE TO BE RESTORED (all drive contents will be destroyed) echo echo $[010f]PLEASE NOTE: All partitions on drive %WDRV% will be destroyed. echo set /p ask=Press Y to continue (Y/N) : if not /I "%ask%"=="Y" configfile (md)0xa000+0x50 echo set ask= set HDCNT= set dlet= partnew (hd0,3) 0x00 %ISO% map %ISO% (0xff) map --hook set BOPT=boot=live quiet live-config noswap nolocales edd=on nomodeset ip=frommedia ocs_live_keymap="NONE" splash set RUN=ocs_live_run="ocs-live-general" keyboard-layouts="NONE" locales="en_US.UTF-8" live-media-path=/live toram=filesystem.squashfs ocs_live_batch="yes" set PRERUN=ocs_prerun="mount /dev/%BAKDRV% /mnt" ocs_prerun1="mount --bind /mnt/clonezilla /home/partimag/" set RUN1=ocs_live_run="ocs-sr -c --batch -g auto -e1 auto -e2 -j2 -p true restoredisk ask_user %WDRV%" #echo kernel /clonezilla/live/vmlinuz %BOPT% %RUN% %PRERUN% %RUN1% #pause root (0xff) kernel /live/vmlinuz %BOPT% %RUN% %PRERUN% %RUN1% initrd /live/initrd.img title CloneZilla (boot directly from the ISO file)\n Boot from the ISO for advanced options set ISO=%MFOLDER%/Clonezilla/clonezilla-live-20131125-saucy-i386.iso partnew (hd0,3) 0x00 %ISO% map %ISO% (0xff) map --hook root (0xff) chainloader (0xff)
P.S. I am really excited this Christmas - I saw an advert on the TV last week asking people to 'adopt a Snow Leopard' - so I immediately subscribed. I have just had a large cat flap knocked through the conservatory wall and can't wait for it to arrive... I hope it's house trained!
It has been possible to boot directly from a USB drive attached to a Virtual Machine for several years now.
Plop!
One approach is to boot from a Plop ISO and then through Plop you can boot from the USB drive.
However, Plop employs a read-only USB driver stack and so only read-accesses to the USB drive are possible (when in real mode using BIOS calls) when you boot under a VM using Plop. For instance, if you boot to DOS using Plop you will find that you cannot edit/create any files on the USB drive.
Make a .vmdk file
Alternatively, you could make a USB drive vmdk file for VirtualBox to use, using a VBox command line or the MakeUSBVmdk.cmd script to make the .vmdk file for the USB drive. However, this still only allows read-only access to the USB filesystem under VirtualBox (until you boot to an OS which has it's own USB drivers).
VMUB
Download VMUB here (use the small link at the top of the page)
DavidB has solved this problem with his Virtual Machine USB Boot utility (see here for the original blog post which started the development of this utility). This allows you to boot directly from a USB drive using either QEMU or VirtualBox with full read/write access to the USB drive. It works by dismounting the USB drive from Windows, running the VM, and then re-mounting the USB drive when you quit the VM.
This is important for Easy2Boot users because Easy2Boot writes to sectors and files on the E2B USB drive using grub4dos (which uses the BIOS), so unless you have full read/write access, booting from an E2B USB drive via VirtualBox often leads to problems. Most of my YouTube videos and all my preliminary testing of USB booting is done using VBox and DavidB's utility.
Users of grub4dos USB drives may have noticed that the grub4dos 'default' command does not work under VBox when using just a .vmdk file or Plop! This is because the default command actually writes values to a file on the USB drive (usually called default). Using DavidB's VMUB utility however, the grub4dos default command will work just fine!
Tip: Hold down the CTRL key and then click Start and VMUB will not dismount the USB drive before running VBox. This is useful if you are designing E2B menus (for instance) - you can still edit any file on the USB drive whilst VBox is running, then simply reboot (e.g. press F9 in E2B) and it will reboot with the new changes. There is no need to stop the VM and re-run it every time you need to change a file or two.
One thing to bear in mind is that the USB drive will be treated by any OS as a hard drive and not a 'Removable drive'. That means that you cannot use VBox+DavidB's utility to run a Windows 7/8 install from an E2B USB Flash drive as it won't pick up the AutoUnattend.xml file.
Also any OS that tries to look for the boot files only on a USB drive on a USB controller will fail to boot because the USB drive is attached to a 'virtual hard disk' in the VM. Luckily, most OS's scan all devices on boot-up, but a few linux distros specifically look for the source boot files on a USB port. In these case, the VM boot will fail and you will need to try a real system. Some linux distros specifically look for a real CD/DVD drive for the boot files - in this case, booting from an E2B USB drive, even on a real system will fail (the same distro will fail on ANY kind of USB drive, no matter how it was prepared!).
You also need to realise that access to the USB drive is not possible while the VM is running because the USB drive has been detached from Windows at that point (unless you hold down the CTRL key first).
Apart from this, I have found 99% of bootable ISOs, etc. boot just as well from E2B under VMUB as they do when booting on real hardware. If you do experience any problems with a particular payload, then you should test using a real system (try both USB 2.0 and 3.0 ports).
v1.18 is now available for use and testing. Chenall has released a new version of grub4dos with some font bugfixes.
Aliums theme with 'Antique' font.
The $FontTest.mnu menu file has been added so that you can test the appearance of the menu in any of the 36 fonts!
You may immediately notice two changes, the font in the menus will appear thinner and grub4dos 0.4.6a is now used instead of grub4dos 0.4.5c.
Here is a summary of the changes:
grldr (grub4dos) 0.4.6a is now used. If you have a problem then try the latest v0.4.5c from here.
The new versions (2013-11-30 and later) of grub4dos grldr fix a bug where the BIOS fonts are used instead of the loaded unifont font when a new menu is loaded. This means that the text you will see now in the menus will be in the unifont font and so it will appear different (thinner) than in older versions of E2B.
You can now load any font by specifying a full path in your MyE2B.cfg file.
34 new font files are available in the \_ISO\docs\Fonts folder.
The Aliums theme now uses the 'Antique' font.
You can test out all the fonts by copying the $FontTest.mnu file from the \_ISO\docs\Fonts folder to \_ISO\MAINMENU folder.
You can specify that the BIOS font will be used by using 'set BIOSFONTS=1' in your MyE2B.cfg file. The characters used for normal ASCII characters will then appear as they did in previous versions of E2B (thicker).
.isoDOS01 file extension supported (for Win98 and other DOS-based Install ISOs).
Please let me know if you find any problems. I will updated the E2B+DPMS download in a few days if I don't hear about any bugs.
As usual, to update your E2B USB drive, just overwrite all E2B files on the USB drive with the files in the v1.18 zip file.
P.S. RMPrepUSB is not yet updated with the new version of grub4dos. If you use the 'Install grub4dos' button in RMPrepUSB, it will install an older version of grldr and you will not see any font changes in the menu! Use the version of grldr that is contained in E2B v1.18 (or copy the new grldr file to the RMPrepUSB application folder so that RMPrepUSB always uses the new version of grldr).
Today, just to see what would happen, I downloaded a Windows Server x86 32-bit Install image (X13-04874.img Standard Edition Eval version) , renamed it to X13-04874.iso and placed it in the \_ISO\WINDOWS\XP folder on my Easy2Boot USB drive.
I then installed Server 2003 to a SATA hard disk on a Virtual Box VM using the DPMS2 XP drivers and it worked fine. The second CD had to be extracted onto the flash drive and then I ran Setup2.exe to complete the install.
It may not work for all systems as sometimes there are separate 2003 drivers required, but it seemed to work fine on the VBox Virtual Machine. Of course, unless installing to IDE disk drives, the 64-bit version of 2K3 would probably not work and most people would want the 64-bit version. E2B does not support XP 64-bit mass-storage drivers (and before you ask, I have no plans to do so!).
P.S. If you have a working USB Flash drive that will install Server2K3 x64, then you can convert it to a .imgPTN file and add the .imgPTN file to E2B.
Note: Thanks to Wonko from reboot.pro, I have been able to generate some alternative font files for the ASCII character set (0x20-0x7e). The next version of E2B will have these fonts available in the \_ISO\docs\Fonts folder.
The character after !" is the £ (0x00A3) character which is loaded by the unifont.hex.gz full font file.
If no font is loaded then £ is displayed as a 'ooA3' as small characters from the BIOS font. Most fonts display the 00A3 character as ú.
These fonts only contain characters 0x20-0x7E, but unifont.hex.gz contains all unicode characters including the A3 (£) font.
The new .isoDOS file extension that is recognised by Easy2Boot v1.17 and later versions, allows you to boot a DOS-based bootable ISO and access all the files on the CD-ROM portion of the ISO from DOS. It does this by making an empty virtual drive in memory and copying the contents of the ISO into it (under grub4dos) before it boots to DOS. DOS can then access the files on this virtual drive.
This method almost worked with a Windows 98SE Install ISO that I had. There were a few problems however...
First, there were just too many files inside the ISO for the grub4dos environment to enumerate! To fix this I simply deleted the unneeded folders from the Win98 ISO and just left the \Win98 folder inside the ISO file plus the [BOOT] folder (required for floppy-emulation booting) and the files that were in the root of the ISO (like Setup.exe). This reduced the ISO to 180MB.
The second problem was that the first disk drive seen by MS-DOS and the Windows 98 Setup install process was my E2B Flash drive. So when I tried to install Win98, it kindly made the 2nd FAT partition which I happened to have on my USB flash drive, active and put the DOS boots files on it!
It still booted to the internal hard disk, but only when I booted from my USB drive!
To fix this, E2B v1.18 will now recognise the new .isoDOS01 file extension. This does the same thing as .isoDOS but swaps over the USB flash drive with the internal hard disk so that DOS sees the internal hard disk as the first hard disk.
So, in summary, to get a bootable Win98SE Install ISO (e.g. OEM ISO, many others are not bootable) working with E2B (even an NTFS USB E2B drive), do the following:
1. Remove all extra folders from the ISO using an ISO tool - e.g. UltraISO or Daemon Pro so the boot sectors are still present (just leave the \Win98 folder and the files in the root).
2. Rename the iso to .isoDOS01
3. Use Easy2Boot v1.18 or later (it will be available in a few days...)
More details in Tutorial 117 on my RMPrepUSB site.
Update - Alternate Method
This method uses a .imgPTN file but we do not switch to it, we just map it as a large floppy disk image!
Note: If you prefer, you can use ImDisk to make a large floppy disk image, rather than use MakePartImage.
1. Drag-and-Drop the Win98/ME ISO onto the MPI_FAT32 Desktop shortcut. The OEM ISO should be bootable and contain a bootable floppy disk image , so use that one if possible.
Add at least 10MB to the default size as we are going to add some files to it and Windows Setup may also need temporary space.
Copy the .imgPTN file to \_ISO\DOS\MNU on your E2B USB drive (any menu folder will work except for \_ISO\WINDOWS\aaaa folders).
2. Use Switch_E2B.exe to 'switch in' the \_ISO\DOS\MNU\Win98.imgPTN file
3. Use 7Zip to open the Win98.ISO file and double-click [BOOT] and then the Boot-1.44M.img file - you should see the DOS boot files (including IO.SYS).
4. Extract all the DOS boot files to the root of the USB drive (which should be in the CSM mode). Note: If you cannot see a \e2b folder in the root, then you did not do Step 2 correctly!
5. Use Switch_E2B.exe to Restore E2B Partitions on the USB drive to get our E2B partition(s) back.
6. Make a new \_ISO\DOS\MNU\Win98.mnu file with the following contents:
title Install Windows 98 using .imgPTN file\n Install Win98 map $HOME$/Win98_SE.imgPTN (fd0) map (hd1) (hd0) map --hook #set just one HDD and one floppy map --harddrives=1 map --floppies=1 root (fd0) chainloader /IO.SYS
This can be found in the \_ISO\docs\Sample mnu Files\Windows folder on later versions of E2B.
E2B v1.99+ now supports the .imafdhdd0 file extension which does the same as above, so just rename the .imgPTN file to .imafdhdd0 (and no need for a .mnu file). Place the file in the \_ISO\DOS folder so it can be seen in the DOS menu.
7. Boot from E2B and choose the DOS Install Windows 98 menu entry.
Choose the MS-DOS 'no CDROM support' option.
At the A: prompt, run FDISK and set up a FAT partition on your C: drive (IDE hard disk) with an Active boot flag.
8. Reboot to E2B and re-run the DOS Win98 menu.
At the A: prompt type CD \WIN98\ENA (or whatever folder the correct Setup.exe file is in and FORMAT.COM - the one in the root may not work!) FORMAT C: /Q MKDIR A:\TEMP (may not be required) SETUP
(skip the 'create floppy startup disk' option but don't cancel it or Setup will quit!)
Tips: If testing on a VM, configure an IDE virtual disk in a Win98 VM and disable VT-x\AMD-V (at least for the Setup process).
Do not configure more than 900MB of RAM or Win98 may crash!
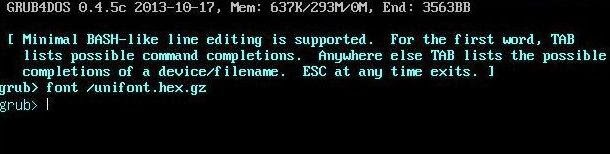
Chenall's grub4dos versions have the ability to load a GNU Unifont hex file using the inbuilt 'font' command. Easy2Boot uses this feature to load the unifont.hex.gz font file.
It seems there are a few bugs with this and chenall is hopefully going to fix this very soon (see issue 160). [Edit] Use grub4dos v0.4.5c 2013-11-30 or later[/Edit].
The normal way to use this is to switch to graphicsmode and load the font file, e.g. a UTF-8 format menu.lst file like this can be used:
graphicsmode -1 800 font /unifont.hex.gz title reboot (重启) reboot
However, we can also define hex fonts within a menu. The following menu will work without needing to use the font command or use a unifont file:
# font demonstration graphicsmode -1 800 title test grub4dos font (GGGgggGGG)\n reload the menu configfile /menu.lst title Reset to BIOS font (use left/right cursor keys to select this menu item) font title reboot (重启) reboot title halt (关机) halt # Define specific UTF-8 fonts just by adding them to the end of the menu.lst file # 4 chinese glyphs 5173:10100810082000003FF8010001000100FFFE010002800280044008203018C006 542F:010000801FFC1004100410041FFC10001000100017FC24042404440487FC0404 673A:100011F011101110FD10111031103910551055109110111211121212120E1400 91CD:001000F83F000100FFFE01001FF011101FF011101FF001003FF80100FFFE0000 # g character - ASCII code 67 hex 0067:0000000000023A44444438203C42423C
Note that the four chinese characters are displayed correctly and also the letter g is in a different font. Each glyph has a unicode hex index number - you can look them up on a chart here. Standard ASCII characters are in the Basic Latin (ASCII) chart. The font command will overwrite any existing ASCII font with the font contained in the BIOS, thus selecting the 2nd menu item will cause the g to be displayed in the standard font but the four chinese glyphs will be unaffected (as they are not part of the BIOS font table). Note: If you try this yourself using an October/early November 2013 version of grub4dos, you will find that the g character will not be changed due to a bug in grub4dos. Hopefully, chenall will release a new version to fix this issue soon. This feature means that you can define your own special characters if you wish, without needing to use a hex font file. If you only need a few special characters, you can just use the relevant lines taken from the unifont.hex file (extracted from unifont.hex.gz). For instance, you can redefine the letter g as a series of vertical lines using: 0067:AAAAAAAAAAAAAAAAAAAAAAAAAAAAAAAA
As the hex byte AA is 10101010 in binary, we get 4 vertical lines per characters, like this:
Of course, you can use a different character code such as 0024 for $ rather than 67 for 'g'.
Note: The latest versions of Easy2Boot contain a variety of grub4dos font files for the standard 'Basic Latin' 0x20-0x7E characters.
If you have an ordinary WinPE ISO file on your Easy2Boot USB multiboot drive, you can make it automatically load the ISO file as drive Y: if you rename the file with a .isoPE or .isoPE01 file extension (more info here). However, PE ISOs are only mounted as a virtual drive when wpeinit runs, which for most WinBuilder PE builds is too late! So if you use a .isoPE extension for your WinBuilder PE ISO, you may not see all the Desktop icons (but the ISO will be loaded as drive Y: eventually by E2B).
Many WinBuilder builds have a \Windows\System32\winpeshl.ini file which typically runs some early Desktop initialisation utilities before the Easy2Boot unattend.xml has a chance to run and load the ISO as virtual drive Y: - e.g.
Luckily (actually, probably luck had nothing to do with it!) most builds of WinBuilder have a special feature which will load the ISO file automatically as drive Y: on boot, if an .INI file is found.
For example, if you have made a recent WinBuilder Win7PESE ISO, just place a file in the root of the E2B drive called Win7PESE.ini with the path and filename of the ISO - e.g.
[IsoInfo] IsoName=\_ISO\MAINMENU\Win7PE_x86.ISO The filename may vary depending of what PE build you are using. The .ini file will cause the WinBuilder PE to load the ISO as drive Y: when MountPEmedia.exe runs. Consult the documentation for the exact INI filename that is required (click the yellow warning triangle that appears on the PE Desktop when drive Y: is not found).
TGP1994 on reboot.pro wrote that he had a Dell Optiplex 7010. He had made an Easy2Boot (E2B) USB Hard drive and also an E2B USB 'Helper' Flash drive. The problem was that when both USB drives were connected, the Dell insisted on booting from the USB Flash drive and would not boot from the E2B USB Hard disk.
If you are using the E2B Helper+USB HDD combination, it would be useful if you could boot from either of them and still run E2B. To do this, just install grub4dos onto the USB Helper Flash drive and also copy the grldr file onto it (using RMPrepUSB). Then add a new menu.lst file (press F4 in RMPrepUSB) and add these lines:
echo Booting from the Easy2Boot Helper USB Flash drive...
find --set-root /_ISO/e2b/grub/menu.lst
chainloader /grldr boot
This will allow you to boot from either one of the USB drives and run E2B. However, you will only be able to run Windows Install ISOs. If you use any function which uses the grub4dos partnew command (e.g. booting from a linux .iso file) this will not work because partnew makes a new partition on hd0 (the boot drive) and the ISO file must also be on the same drive. As hd0 will be the helper flash drive and the ISOs are on the USB HDD, partnew will not work. v1.23 and later may fix this issue.
Ashwani emailed me today to ask how he could get his Partition Magic ISO to boot correctly.
It turns out that this ISO boots via MS-DOS Floppy Disk emulation, it then loads the MSCDEX CD-ROM driver to give access to the files on the CD as drive S:.
This type of ISO is difficult to boot from successfully without modification, because there is no 'CD' for the CD-ROM driver to find when booting it as an ISO file from a USB drive. As a workaround, I have added support for the special .isoDOS file extension to E2B v1.17. This will copy the contents of the CD part of the ISO to a virtual floppy drive so that all the files are easily accessible from DOS.
In the case of this particular ISO, what Ashwani needs to do is install E2B v1.17 and then copy his DOS-based Partition Magic.iso file to the \_ISO\MAINMENU folder and change the file extension to .isoDOS.
What will happen when you pick this entry from the E2B menu, is that E2B will create a large FAT16 virtual floppy disk (fd0) in memory and then copy the files from the ISO to the virtual floppy.
When grub4dos boots, it does so via floppy emulation and so the virtual fd0 is shifted by the BIOS to fd1, and fd0 becomes the floppy boot image which was on the ISO file boot sectors. Thus when DOS boots from the emulated floppy image on the ISO, it will be drive A: and the CD files will be found on drive B:.
When Autoexec.bat runs (or Config.sys), no CD will be found and there will be no drive letter assigned to the 'CD' and thus the ISO will probably fail to run any program automatically from a batch file.
However, if we look at the contents of the A:\autoexec.bat we can see that it runs MSCDEX to assign drive S: as the CDROM drive letter, changes to the S: drive and then runs either 'ghost.exe -nousb' or 'pqmagic.exe'.
So all we need to do is type:
B: ghost.exe -nousb
to run ghost, or
B: pqmagic.exe
to run partition magic.
The new E2B version can be found at the very bottom of the page of Tutorial 72a (as usual).
The .isoDOS file extension may prove useful for a variety of DOS-emulation based ISO files. If you want to, you can edit the startup files in the ISO to remove any cdrom drivers and use the drive letter B: instead for the 'CD' volume (instead of S: or whatever was used), then it will boot automatically directly from the ISO under E2B.
v1.17 also now has an option to suppress the checkaccess BIOS bug check on startup and also has modified code around the finding of the \autounattend.xml file (which hopefully has not broken Windows installs!).
I have added a new Tutorial so that you can add old DOS-based Hirens ISOs to Easy2Boot (or any grub4dos USB drive) here.
The Get_Boot_Files.cmd batch file is useful because it extracts the DOS boot image from any ISO and makes a 1.44Mb .bin file from it, which can be read by WinImage or ImDisk, etc as a floppy disk image. It also extracts the files from the ISO boot image for you, into a new folder.
The Tutorial is based on an original article I found here.
Note: grub4dos has now been fixed and E2B v1.22 and later now contains dozens of different fonts which can be used by E2B simply by specifying the font file in your MyE2B.cfg file! This article is therefore now (2014) outdated.
Easy2Boot loads the unifont font file so that non-Roman characters can be displayed.
You may have noticed that the when this occurs during booting, the text changes from relatively bold characters to thin characters:
However, when a grub4dos menu is loaded using configfile, grub4dos changes the text back to bold.
It would be nice to have different fonts selectable in E2B and maybe also be able to select italic or bold fonts for the menus too. I am working on this, but for now, if you want to try using the thin font in your menus, you can try this workaround:
At the bottom of your \_ISO\MyE2B.cfg file (which should start with !BAT on the first line), add these
two lines:
set gg=;; set pwd=easy2boot %^gg% font /%grub%/unifont.hex.gz
This will cause all menus to be displayed in the thin font (except the Windows Install menu).
Let me know if you want to have this type of thin font as an option for all your menus.
P.S. You can change the line width and separate each individual menu entry by changing the lnspace variable value in \_ISO\MyE2B.cfg. The spacing between letters can also be changed using the wdspace variable. Here is what you get using a MyE2B.cfg file of:
!BAT set gg=;; set pwd=fred %^gg% font /%grub%/unifont.hex.gz set wdspace=2 set lnspace=4 set topstart=2 set rstart=3 set noitems=18 set menuw=42 set bdwidth=1 set tophelp=20
Note that because the word spacing has been changed, it affects the menuwidth (menuw) setting because less characters will fit across the screen. The number of menu items is also affected if you increase the lnspace setting.
I would not recommend changing the wdspace value (keep it at 0) as this affects the menu title spacing at the top of each menu.
When I was sixteen (many years ago now - I would have to print the year in Roman numerals to tell you what year it was!), I took the UK Amateur Radio Exam (RAE) after joining the Harwell Amateur Radio Club for a year or so and taking part in a 24hr Ham Radio contest stuck on the top of the cold and windy Chiltern Hills all night trying to keep awake! Unfortunately, I failed the exam by just 1 grade (I was in the middle of revising for and taking 10 GCSE O-levels at the same time, so I sort of had an excuse... and the RAE wasn't multiple choice like it is today!). If I had passed the RAE, I believe I would have been the youngest person to have become a licensed Ham in the UK (at that time). Shortly after that, my family moved from the Berkshire countryside into the middle of Oxford City and so I waved goodbye to my hand-made 102' aerial on it's 30' mast strung up to my bedroom window and attached via coax to my Trio ham radio receiver and self-built valve notch pre-amplifier... and never went back to Ham Radio ever again (sigh...).
Have you ever wanted to listen to Amateur Radio (aka Ham Radio) but didn't want the expense and bother of buying the equipment and erecting an aerial, etc? Well why not listen to it over the web?
You may have heard of SDR (Software Defined Radio). A basic SDR system may consist of a personal computer equipped with a sound card, or other analog-to-digital converter, preceded by some form of RF front end. Significant amounts of signal processing are handed over to the general-purpose processor, rather than being done in special-purpose hardware. Such a design produces a radio which can receive and transmit widely different radio protocols (sometimes referred to as waveforms) based solely on the software used.
Well, if you connect an SDR PC to t'internet, you get a highly tunable radio that can be controlled by anyone on the web. The University of Twente in the Netherlands have made just such a thing available for us all here.
Twente - Wide-band WebSDR
1. Click here to go to the website - if you get a Security Warning, don't worry, it needs to run an app. - so enable it to run.
2. Next scroll down the page until you see the cyan box for HTML5 and click the 'Click for test of the HTML5 audio' button - if it works then enable HTML5 for both Waterfall and Sound. This gives a better and more controllable display.
2. Next, type in your name or nickname in the log-in cookie box (optional).
3. You should see a moving waterfall display. The frequencies are shown along the X-axis. There is an Amateur band shown in green at 20m, so click on the dark green 20m text. This should move the yellow pointer to that position.
4. Now we need to zoom in for better control, so click on the 'Waterfall view - zoom in' button just below the waterfall graph until you have the whole 20m band in view. If necessary, click and drag the waterfall display across, so that the 20m band is in the correct position. If you zoom in enough, you will see some known station id markers appear - see below:
5. Now find a station in the green 20m band - start with one of the strong white ones and either drag the cursor to that position or use the Frequency adjust buttons (---, --, -, +, ++, +++) to move the frequency cursor. Make sure the AM button is clicked to start with.
6. When you start to hear a channel that sounds like a voice (but it may sound like mickey-mouse or Johnny Cash if a side-band is being used), then use the same Frequency buttons to fine tune for the strongest signal by looking at the signal strength bar:
7. Now we need to find out what type of transmission it is. If the voice sounds like it has been pitch-shifted, try clicking one of the LSB (Lower Side Band), USB (Upper Side Band) or other similar buttons to get the most intelligible sound. If you can hear more than one voice or have other interference, try narrowing the bandwidth using the 'narrower' button. If the signal is weak, try the 'wider' button to try to get as much of the signal as possible (without picking up other broadcasts). Amateur transmissions are not normally FM (Frequency Modulated), so you shouldn't need this unless you are listening to BBC Radio 3!
8. You can now try the squelch and autonotch check-boxes to see if it improves things.
9. Once you have found something and it is nice and clear, use the store button to save that frequency and all other settings. You can also record it using the 'Recording - Start' button.
Have fun!
Steve
P.S. OK, so it is nothing to do with USB, but you can get USB SDR receivers and with special software, hack them to make your own SDR - search for SDR on YouTube if you are interested or click here for a Hak5 video by 'Snubs' using a $20 dongle.
If you know of any other web SDRs or have anything to add, please add a comment.